The ventilation fungus is the final element of the ventilation system, which removes polluted air from residential and office premises. The absence of an exhaust hood, incorrect installation of the fungus - all this leads to the formation of condensate in the ventilation ducts, the ingress of precipitation, insects into the air duct, as a result - poor-quality ventilation of the building.
Roof ventilation fungi
What is it and what is it for?
The external element of the ventilation system, installed on the roof of the building and made of metal or plastic material in the shape of a mushroom, is called a ventilation fungus. Fungus for the ventilation system is an element that completes the cycle of moving a mass of air from internal living quarters to the external environment. It ensures the removal of carbon dioxide, unpleasant odors, regulates humidity.
This ventilation element is installed on residential buildings, buildings that store materials exposed to dampness. Fungi protect air ducts from precipitation, debris, small insects, birds. When installing such a cap on a pipe, be sure to follow all the rules. A wide range of fungi allows you to give the building an attractive look.
Tools and materials for installation
During the installation process, you will need to work directly with the materials of the roof and the fungus, as well as perform fastening operations. For possible cutting of plastic, you will need a metal saw or electric jigsaw. It is better to cut the metal profile of the roof with assembly scissors, having previously made a slotted hole with a chisel. It is advisable to tighten the screws with an electric tool - a screwdriver with the appropriate bits. For a sealed installation of a roof ventilation fungus, you will need a waterproof sealant. Complete assembly is carried out using the deflector assembly, flange elements and gaskets, which are supplied with the ventilation duct.
How does a fungus work?
Initially, the roof fungus was made of galvanized steel. Especially popular are structures made of impact-resistant polypropylene, which is slightly exposed to the sun, frost, and corrosion. In some types of hoods, the inner tube is made of steel alloy. The ventilation fungus includes a number of elements:
- 2 pipes (for gas outlet, fixings with a horizontal section of the air duct);
- fasteners (flanges);
- container for the accumulation of condensate;
- air valve, which is responsible for the necessary air circulation;
- rings for support, fastening;
- aerator (a device that saturates the room with oxygen);
- deflector (a device that increases the draft of air flows);
- valves.
Roof ventilation fungus
How is ventilation installed?
Naturally, the installation of exits involves drilling holes in the roof. But without proper care, they can turn into real holes, which will later cause the roof to leak. To eliminate the likelihood of a roof leak, you need to purchase special pass-throughs for metal tiles. matching in color to the overall design.
The installation of ventilation pipes on the roof for metal tiles includes several important points:
- There should be one point ventilation outlet for every 60 square meters.
- The distance from the ridge to the point ventilation element must be less than 60 cm.
- The complexity of the roof structure increases the number of output elements.
- When installing the element, the template that is usually included with the delivery set must be used.
- The holes in the roofing tiles should be in line with the marked line.
- Use screws to attach the rubber O-ring and then apply a silicone sealant.
- The passage element is installed in place, after which the pins of the element are connected to the seal hinges.
- This whole structure is fixed to the roof using the screws included in the delivery set.
- From the side of the attic, a sealant is nailed for the waterproofing layer. If ventilation pipes to the roof pass through a layer of thermal insulation, this place should be additionally sealed with silicone sealants and other seals.
To install the fan on the roof, you do not need to give all your best in material terms (for more details: "Roof fan and its varieties"). An ordinary ventilation pipe on the roof will add you no more than 5% of the cost of the roof, but it is this pipe that will help save precious time and nerves during the further use of the building.
Principle of operation
The ventilation system is based on the principle of upward movement of warm air mass, and downward movement of cold air. For air extraction, natural ventilation, the distance between the source of pollution and the upper section of the duct is important: the greater this distance, the more efficiently the process proceeds.
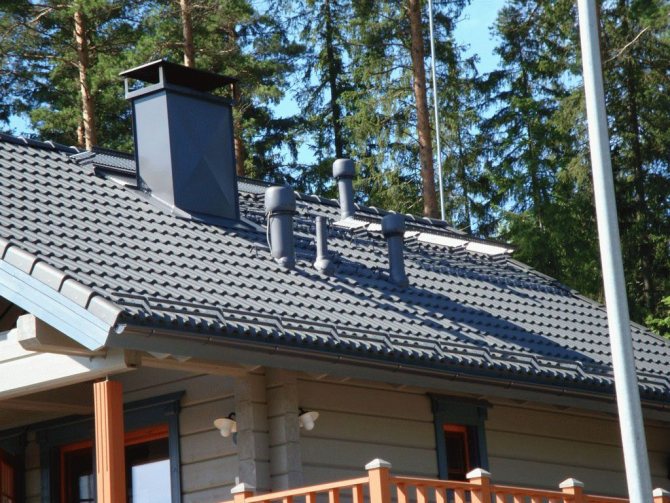
Umbrellas are mounted on the air ducts leaving the bathroom, basement, boiler chimneys. In the cold season, ice build-up is possible in the ventilation pipe and on the umbrella, so they are insulated with heat-insulating materials (mineral wool, polystyrene foam, polypropylene foam, polyethylene foam insulation).
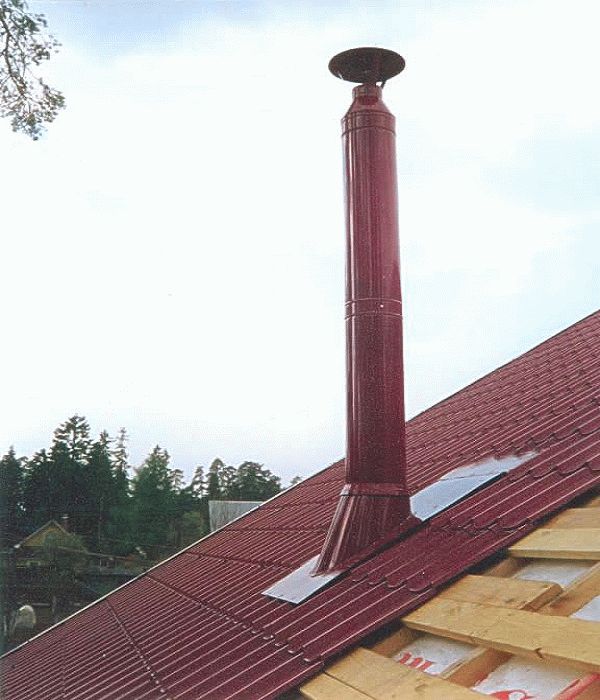
Installation and outlet of the ventilation pipe to the roof
Bringing ventilation to the roof is a very crucial stage in the device of this system, since the efficiency of its operation depends on its correctness. For their good circulation, it is necessary to remove the "exhaust air" outside the house, as well as to provide a natural inflow of fresh air masses. This means that you cannot do without a ventilation duct going out to the roof.
How to bring ventilation to the roof: it is important to provide traction
Constant draft is an essential condition for normal ventilation. In order to create it in the manner prescribed by the current regulations, it is necessary to take into account when designing the system:
- type of building;
- what material the roof and walls are made of;
- insulation material and its need depending on the area;
- the exit point of the ventilation duct on the roof.
Ventilation pipes must be purchased taking into account two basic requirements: they must be moisture resistant and not corrosive. Therefore, pipes made of polymer materials are most suitable:
- thin walls contribute to the high penetrating power of ventilation mines;
- a smooth inner surface reduces resistance to air circulation, and the throughput increases;
- the minimum number of roughness and joints improves the operation of the ventilation system as a whole;
- the pipes are lightweight, so it is not difficult to install them.
Materials and tools for installation
However, if you wish, you can also use pipes made of galvanized, aluminum, stainless steel, polyester. In terms of shape, it is better to choose a round cross-sectional diameter, although some people prefer a rectangular duct. A set of tools that will be needed when installing the outer part of the ventilation duct. Generally speaking, you should have at hand:
- rubber gaskets;
- silicone;
- passage assembly with or without valve;
- screwdriver;
- roofing screws;
- felt-tip pen;
- insulation for pipes;
- electric shears for metal;
- drill;
- jigsaw
The specified "arsenal", for example, will definitely satisfy the needs when arranging a roof made of metal tiles.
Technical characteristics of the ventilation pipe above the roof
The height of the ventilation duct, the angle of inclination, as well as the diameter of the pipe depend on the type of roof. Before installing the duct, it is worth finding out:
- the relative position of the arrangement of heating pipes, chimney, water supply;
- "Roofing pie" - layers, their placement order;
- what is the outer layer of the roof;
- whether the rafter structure includes a ridge girder;
- the size of the slope.
You can be sure that you are doing everything correctly if the following data is present in the developed project:
- The cross-sectional diameter of the ventilation duct is not less than 140x140 mm.
- The height of the ventilation duct to the ridge is 3 m.
- If the roof is flat, then the ventilation duct should rise above it by at least 500 mm.
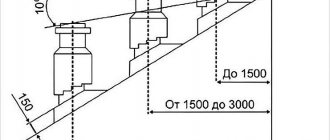
- When the distance between the ridge and the air duct is more than 2 m, then the recommended ventilation duct height is the ridge level; you can position the pipe higher.
- Provided that the ventilation duct leaves the roof at a distance of more than 3 m from the ridge, its height should be equal to the upper point of the ridge.
- The vertical duct should be installed at an angle of 10 °, with a long slope.
Installation of a ventilation duct on a metal roof
Make markings on the roof of a private house using a marker. The ventilation duct assembly includes a template that can be used when marking.
It is necessary to make a hole in the roofing, strictly along the marked contour. To do this, you can use any tool - electric shears for metal, in the case of metal tiles - a chisel, jigsaw. The hole is made through the entire roofing pie.
The roof at the installation site is cleaned of metal filings, dust. Further, another important stage is degreasing. Holes for self-tapping screws are made - the diameter must match the dimensions of the fasteners.
Silicone is applied to the seamy side of the gum of the seal, then it is mounted to the edges of the outlet of the air duct from the roof. Usually, excess sealant will come out of the gum when properly seated.
Important! If the drilled holes in the roof tiles do not receive the necessary maintenance, then over time they will cause the roof to leak. To avoid this, you can buy special incoming elements for metal tiles in advance. They can be selected in the desired color.
Installation of a ventilation duct on the roof through ondulin
Ventilation pipes can be matched with ondulin roofing sheets. They are sold in a similar color scheme. They are easy to install. The ventilation pipe can be selected from ABS polymer.

For example, its length is 860 mm and the height above the roof is 470 mm. Installation of the ventilation duct is carried out as follows:
- ondulin sheets are attached around the place where the pipe is supposed to exit from the roof hole - the exception is a sheet that will be located above the pipe;
- at the installation site of the ventilation unit, it is necessary to fix the base sheet with fasteners for the ventilation pipe;
- it is necessary to install the ventilation duct taking into account each wave of the onduline coating;
- ondulin, which is mounted above the ventilation duct, is attached with an overlap on the base sheet of approximately 10 cm;
- it is necessary to insert the ventilation duct vertically into the base sheet, and secure with plastic pins.
Important! The ventilation pipe must not be located below the ridge. Ventilation will not function properly due to lack of proper draft.
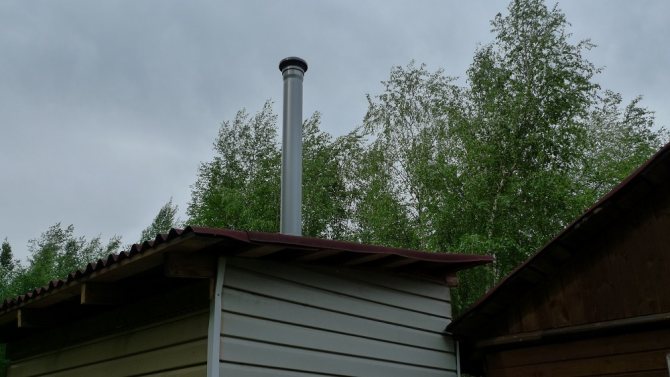
Precipitation and ventilation stack: methods of protection
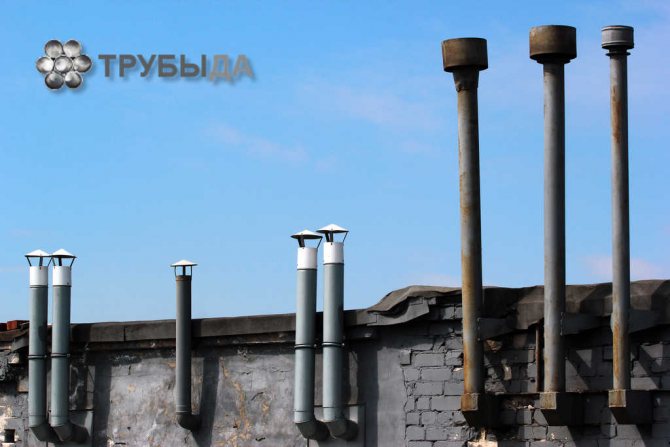
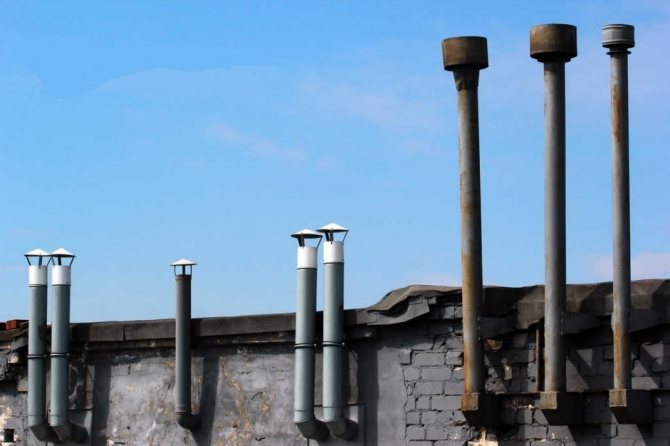
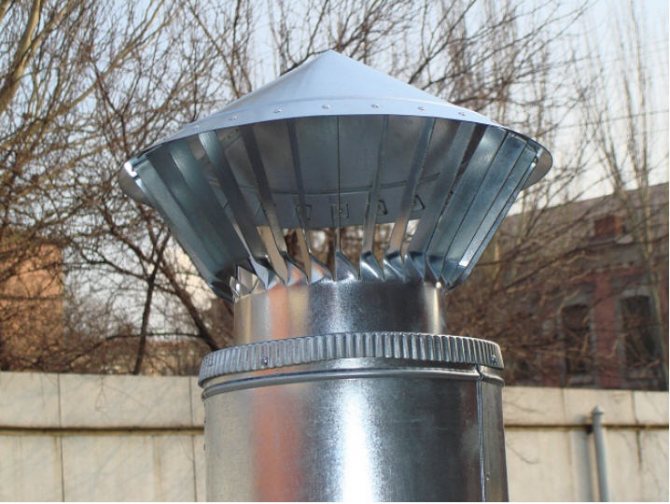
To protect ventilation ducts from seasonal precipitation, you can use a fungus for ventilation. It is mounted on top of the ventilation pipe. Vertical racks are placed under the cone-shaped head. The protective device is most often made of stainless steel or polypropylene. The main requirement is the resistance of the material to corrosion. Since it is installed at the highest point on the building, no additional maintenance is required.
The ventilation fungus on the roof should be installed not only to protect against precipitation - it prevents the wind from blowing into the duct. The fungus can also serve as a decoration for a building - manufacturers produce it in different colors.
The fungus is easier to mount on circular ventilation ducts. To adapt the protective structure to a ventilation pipe with a certain diameter, manufacturers make the rim of the protective umbrella open. The fungus on the roof for ventilation is attached with self-tapping screws or screws to the ventilation pipe. Protecting the ventilation from birds, you can additionally install a mesh on it.
Protecting the ventilation system from adverse factors, do not forget about preventive care. It should be done at regular intervals. Pipes become dirty and clogged during operation. Prevention is an easy task, so you can do everything yourself, while saving money on calling specialists.
Conclusion of ventilation on the roof of a private house How to independently install a fungus on the roof for ventilation. When and how to bring ventilation to the roof. Metal roof ventilation fungus.
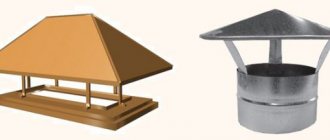
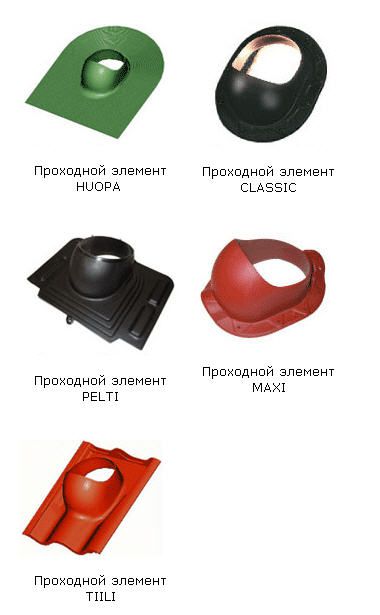
Types, shape and design
Depending on the room in which the fungus is installed, a conventional or heat-resistant type of structure is selected. Conventional hoods are suitable for a bathroom, toilet, kitchen and basement area, cellar. Heat-resistant fungi are mounted on pipes exposed to heating and installed in the boiler room.
The volume of gas discharged from the room determines the size of the duct, the fungus. The diameters of the structures are different, they range from 1 to 3 cm. The simplest option consists of a pipe and an umbrella made of sheet metal. More expensive models are practical and aesthetically pleasing and include a larger set of elements (glass for excess moisture, heat-insulating material). Both types of ventilation fungus are installed on the roof, fixed with fasteners.
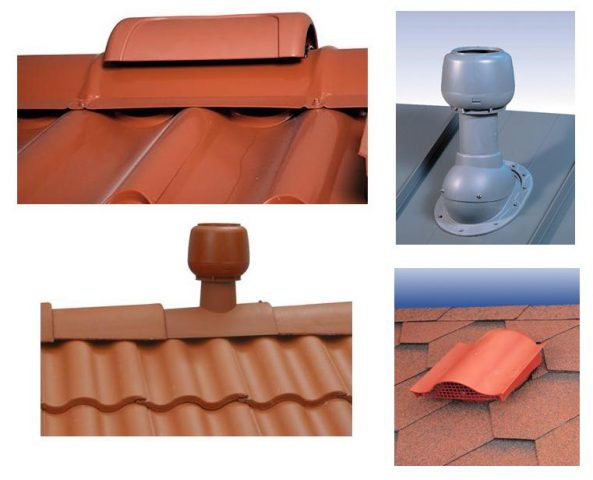
Types and forms of fungi
Varieties of ventilation pipes on the roof for metal tiles
If we consider the fungi intended for ventilation pipes on metal tiles, then they can be ordinary and heat-resistant. Ordinary, as a rule, are used mainly for hoods from the kitchen and cellar, bathroom. Heat-resistant fungi are installed on pipes, which are designed to remove combustion products from furnaces and pipes. Thus, ventilation of a roof made of metal tiles is impossible without the use of a fungus.
Advantages and disadvantages
The accumulated carbon monoxide and carbon dioxide are invisible to humans, but they cause poisoning of the body. The ventilation ducts are always led out to the roof: this ensures natural air circulation. The exhaust pipe rises to the maximum height, a fungus is installed on it. Thanks to ventilation fungi, polluted air is removed regularly, regardless of the weather and the area of the room. The main disadvantage of the hubcaps is the high cost of factory models. The advantages of factory designs are undeniable:
- lightness, structural strength;
- protection of the air duct from clogging;
- protection against reverse draft, smoke.
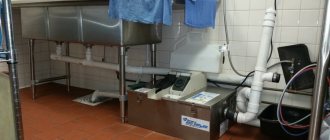
Ventilation penetration assembly
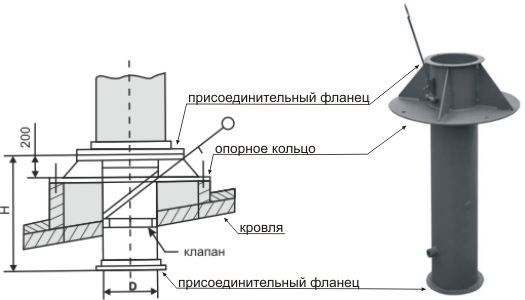
Unit UP2 for the passage of ventilation through the roof
The design of the simplest nodes for the passage of the ventilation pipe through the roof is a metal pipe that is inserted into the hole and fixed on a reinforced concrete or steel glass. The roof entryway can be equipped with a shut-off valve and condensate collection ring. An outlet duct is connected to the pipe from the bottom through the flange. From above, this unit can be equipped with a deflector or a simple protective umbrella. There is an option with insulation, which is used as mineral wool.
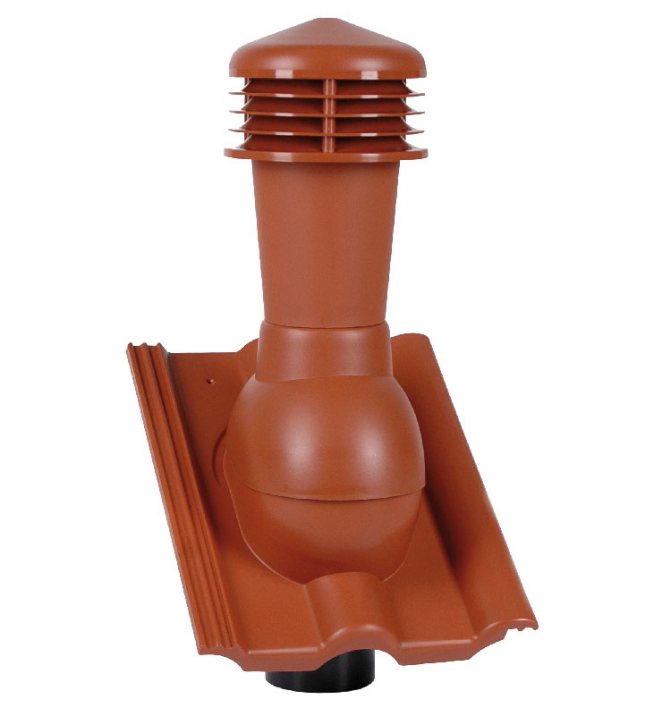
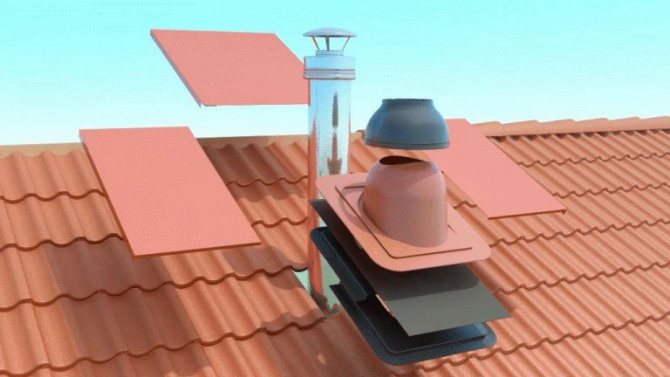
Products for roof ventilation of a new level of quality are considered to be more in line with the technical and aesthetic requirements of the modern era. The design principles of such ventilation outlets are practically the same regardless of the manufacturer, with only minor differences. From a number of similar products, the most popular are ventilation outlets on the roof, ventilation covers and ventilation fungi on the roof of the Vilpe Vent brand.
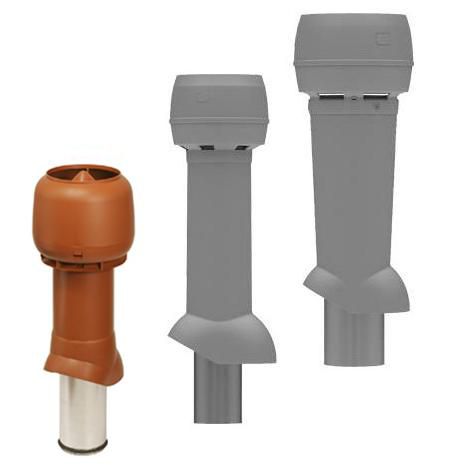
Modern models of ventilation outlets
Their advantages:
- the inner tube is made of galvanized steel, and the outer tube is made of durable and lightweight polypropylene;
- the outlets are fastened to a reliable pass-through element of the corresponding shape;
- the height of the pipe varies in different versions from 400 to 700 mm;
- the lower part of the pipe is equipped with a seal and can be inserted into the air duct to a depth of 300 mm;
- the inner diameter of the ventilation outlet pipe ranges from 110 to 250 mm;
- the ventilation outlet pipe is thermally insulated to prevent the formation of condensation and ice plug;
- it is possible to put an electric fan on the ventilation outlet;
- a hood with a deflector protects the pipe from precipitation and increases traction.
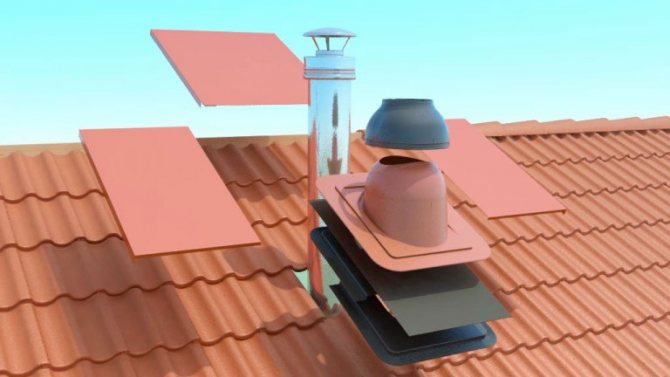
In some cases, the pass-through is not included in the kit and must be purchased separately. Choose it taking into account that the shape of the lining of the passage element corresponds to the type and profile of the roof covering.
Passages for various types of roofing
Pass-through elements provide the versatility of installing the ventilation pipe on any roof. Their installation can be carried out both simultaneously with the construction of the roofing, and on the finished roof. With these products, there is no doubt about the stability and tightness of the ventilation outlets.
Life time
The hoods for ventilation pipes have a long service life if they are not subjected to strong mechanical stress (hurricane wind, falling branches). Products made of asbestos cement and steel serve 10-15 years. Modern models, based on polymer plastic with a UV protection function, are designed for a long service life - 50 years. Their service life depends on several factors:
- corrosion resistance;
- product thickness;
- the presence of a container for collecting moisture;
- the quality of the installation performed;
- insulation of the ventilation duct with heat-insulating materials.
Modern fungus models can last up to 50 years
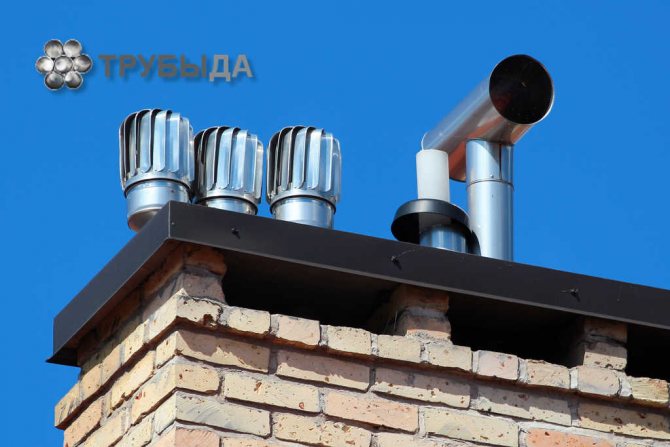
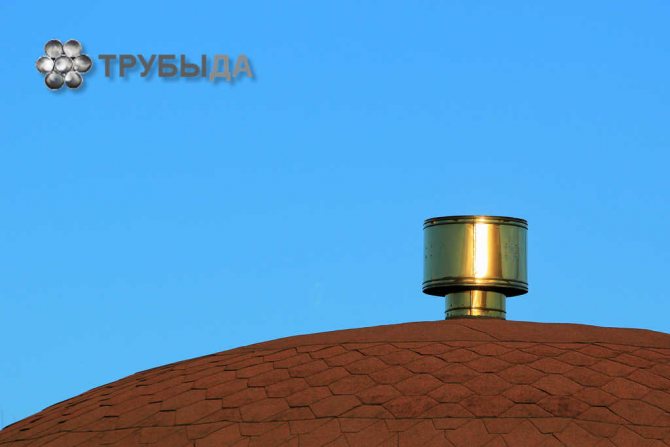
Chimney umbrella
To do this work, you need to prepare tools: a drill, metal scissors, a hammer and equipment for installing rivets. Once the dimensions of the fungus are determined, work is done in the following order:
- Screw two self-tapping screws into a wooden plank, keeping a distance between them equal to the radius of the product 15 mm. It turns out a homemade compass, through which you can make a basting on the metal, marking the central part of the circle. Its outline is also drawn.
- The workpiece is cut with scissors, after which a sector is drawn, the arc length of which is 120 mm. The resulting figure is somewhat reminiscent of a piece of cake.
- The specified wedge is cut out, after which the outer edges of the figure are combined with effort. Fix them with a vice.
- Three holes are drilled along the resulting slab and the ends of the part are connected with screws or rivets. The upper part of the weather vane can be considered finished.
With the help of steel strips, legs for the fungus and a clamp around the pipe are created. They take thin sheets that are bent several times. These parts are similarly fixed to the umbrella with rivets.
Further, using the formula and the finished scan given below, calculate all the dimensions of the cap and proceed to the blanking work. For convenience, it is recommended to cut the pattern out of cardboard in full size with scissors. Then you need to attach it to a sheet of metal, circle it with a sharp object and start trimming.
The rest of the operations are performed in the following sequence:
- bend the cut-out workpiece along the lines with the letter d, and then along the dotted lines (see pattern);
- drill the joint of the cap and rivet;
- complete the base and legs of the product: for this, take the same metal and bend the corners from it, which then connect with rivets;
- connect the hipped roof on the chimney to the base, this can also be done with rivets;
- install the finished product on the pipe.
According to building codes, a deflector cannot be installed on the outlet of gas boilers. This is due to the fact that in winter, due to low temperatures of the outlet flow, icicles are formed in the horizontal sections of the pipe, which worsen the draft.
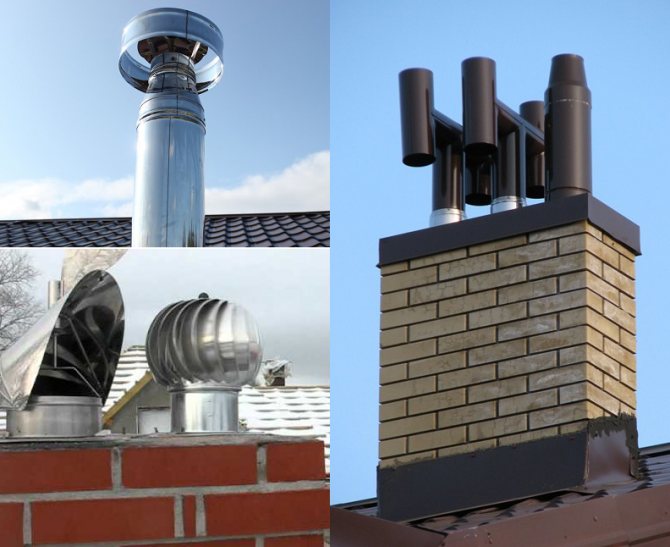
Experts recommend installing deflectors on the metal pipe of solid fuel boilers. In all other variants, chimney hoods are recommended. The shape of the hood is selected in accordance with the shape of the chimney: round umbrellas are usually placed on round ones, on square and rectangular ones - in the form of a small pitched roof.
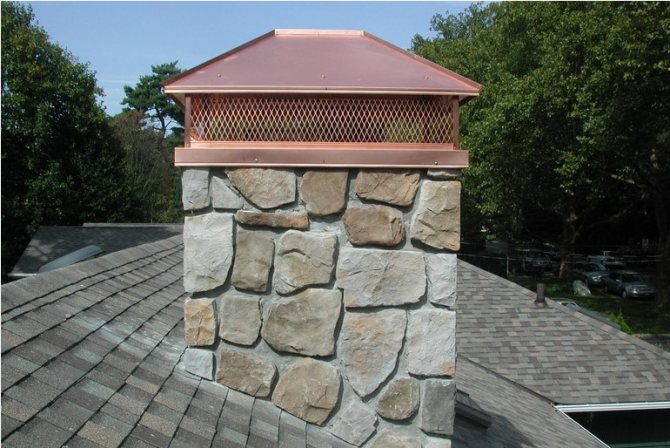
It should be noted that on sandwich chimneys, chimneys must have a special skirt that will cover the thermal insulation. For brick chimneys, it is recommended to make a cap with a base that will cover all the bricks protruding above the roof.
Not a very good attitude from experts to weather vane: constant vibration and considerable weight quickly destroy even capitally constructed pipes. So if you wanted to have a weather vane, think about it well: it not only adversely affects the chimney, but also wears out quickly due to constant friction.
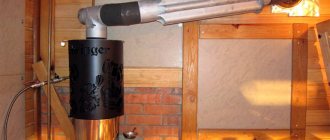
DIY manufacturing and installation
A roof ventilation hood can be made at home using the tools and materials at hand. To do this, it is enough to take two metal pipes (larger and smaller diameter), a flat disc, and a welding machine.
The source material is selected depending on the size of the duct. Installing the fungus will require intervention not only in ventilation, but also in the roof of the building. A hole is cut in the roof pie through which the pipe is led out. The vent fungus is placed on top of this airway tube.
Material selection
The service life of a roofing cap is determined not only by the quality of installation, but also by the choice of material for its manufacture at home. When preparing for work, the following should be considered:
- the main pipe must be made of polymer plastic or stainless steel;
- ventilation hoods are best made of plastic (high temperatures will lead to configuration changes);
- opt for fasteners made of aluminum and stainless steel (do not corrode);
- exclude wood, sand-lime brick, black steel and asbestos cement as a starting material (they quickly deteriorate).
Calculation of dimensions
Exhaust hoods are installed in the roof of the building with complete exclusion of the possibility of smoke from entering them from a working oven. The inner section of the fungus is taken into account: it must be no less than the section of the supply channel. For example, the diameter of the flue is 30 cm, then the cross-section of the hood should be the same. The hood installed on the roof slope must rise by more than 20 cm. When the roof is used as a recreation area, the pipe is raised by 2–2.5 meters.
Installation features
An ideal ventilation system includes several air ducts that exit in a strictly vertical direction without horizontal bends. When installing the ventilation outlet, the following sequence of actions is observed:
- A hole is cut in the roof of the building (for this, metal scissors or a saber saw are used), a metal gasket is mounted on top of it, previously sealed with a liquid sealant.The gasket is attached with self-tapping screws.
- A special adapter is installed on the gasket, which will henceforth protect the outlet from precipitation and fix the cap.
- The fungus is mounted inside the adapter, inserted into the duct pipe, fastened with bolts, nuts.
- Using the building level, the verticality of the installed fungus is checked.
It is advisable to install a duct pipe with a ventilation fungus at the highest point of the roof. This will provide strong draft and air circulation. The best option is the ridge of the building, which separates the parts of the gable roof. If it is impossible to implement this option, the fungus is located as close to the ridge as possible. The ventilation outlet, located far from the ridge, is equipped with a high fungus. Insufficient height of the structure will lead to low pressure in the pipe, as a result - ineffective ventilation.
Possible mistakes
The most common mistake when installing a fungus is the lack of insulation on the ventilation duct and the product itself. Basalt wool is more often used as a heater; a stainless steel cylinder is fixed on top. Another option is to cover the channel with construction foam. Other errors are possible when installing the fume hood:
- joints are not sealed with special means;
- materials that are prone to corrosion are used as the material of the ventilation ducts;
- pipes that come out of the rooms at different levels are connected into a single passage;
- the wrong place is chosen for the vent fungus.
Ventilation fungus is a metal or plastic product resembling a mushroom and installed on the roof of a building. It protects the air duct outlet from precipitation, increases the draft in ventilation (removes polluted air, carbon dioxide and other gases).
Self-assembly of the ventilation hood is not particularly difficult. The main thing is to comply with the installation rules and select a high-quality exhaust fungus. You can use a ready-made factory design or make a do-it-yourself vent fungus. The correct calculation of the dimensions and the selection of the right material is the key to effective ventilation, which will provide a healthy and comfortable microclimate in the room.

Roofing cake and its device
- Group: Administrators
- Posts: 410
- Registration: 31 December 09
Posted 14 May 2010 - 11:17
Almost the entire roof is susceptible to the appearance of thickets of fungus. As a rule, it begins to grow from the north side. Manufacturers of natural roofing recommend treating with an antiseptic every five or six years, sprinkling the roof.
Some may have a question: why do you need to conduct ventilation at all and spend additional funds when you can do without these works. The answer is obvious. First of all, ventilation maintains a beneficial microclimate inside the roof.
This will help each of its elements to calmly carry out their work, without fear of destruction. Also, the quality of work of thermal insulation depends on ventilation, if you performed these works when installing the roof, taking into account the height of the pipe above the ridge.
Improper operation of ventilation or its absence at all can lead to the following problems:
- Condensation on materials. Wood materials such as rafters and beams will prematurely deteriorate or rot. Condensation on metal and other elements will cause their corrosion, and in the future, and complete destruction (read the article: "How to eliminate condensation under the roof").
- Moisture also forms on the roof surface. This can already lead to the formation of ice and the destruction of some types of roofing material.
- Steam condensation on the insulation. The insulation layer will get wet and subsequently lose its thermal insulation properties. This means that it can be worse with insulation than without it.
We suggest that you familiarize yourself with: Killing nail fungus in the body
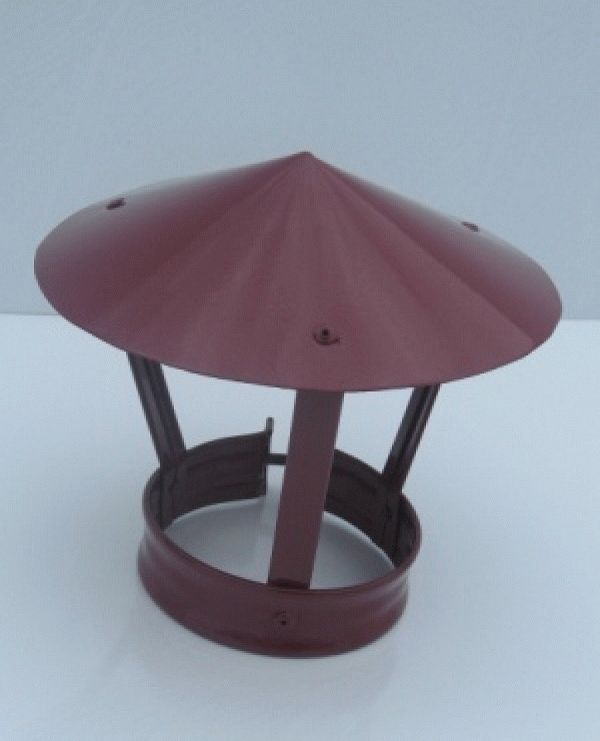
Standard fungus designs
Fungi for ventilation units is one of the oldest and most proven devices for venting ventilation ducts. The modernization affected only thermal insulation, which is now made from more modern materials. The design of such a device is quite simple, which makes it possible to perform it yourself.
The standard fungus is a regular large diameter pipe. For installation on the roof, a disk is put on the pipe from above, which is lowered by about ¼ of the total length of the pipe and welded to it. This disc acts as a stop for roof mounting.
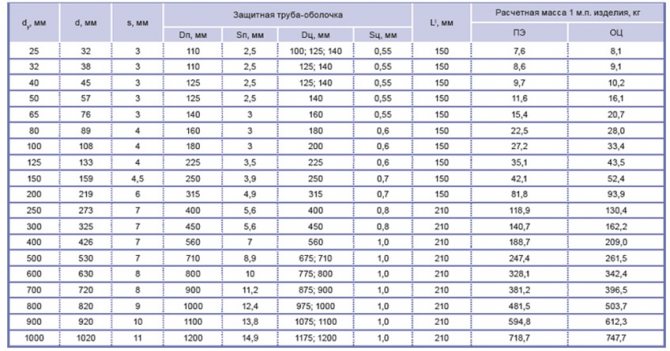
Dimensions of ventilation outlets.
Next, a "glass" is put on the pipe (both on the upper and lower parts), the task of which is to collect condensate. The lower part (under the disc) is insulated. Previously, insulation was carried out with cotton wool, mineral wool or rags. Now the fungi are isolated with polyurethane foam or aerated concrete. A valve is mounted inside the pipe, which is triggered by a pressure drop.
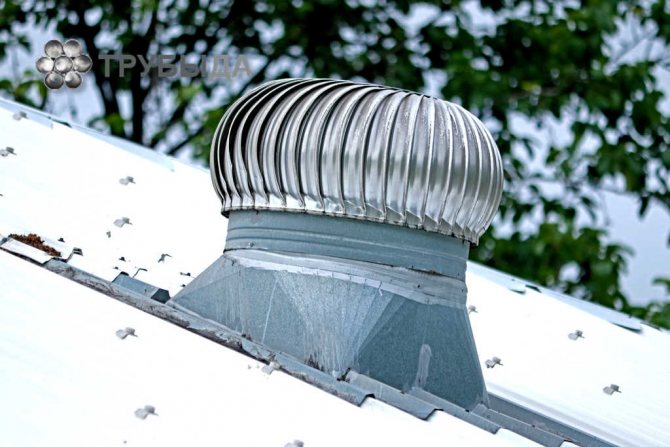
Modern fungi have a more aesthetic form and are distinguished by a careful exterior finish. Some models are supplemented with a propeller to increase the pressure build-up. The principle of their work is the same as that of the old ones.
Their advantages are as follows: the use of modern, lighter materials, instead of a fastening disk, you can choose elements for fastening for a specific material and roof surface, some manufacturers make mushrooms with a built-in electric fan. In addition, a special cap has been developed that prevents precipitation from entering the pipe.