Pros and cons of warming the attic of the house with expanded clay
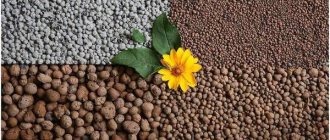
In the construction market, expanded clay is not a novelty. Insulation was used in the last century. However, its popularity continues to persist due to its many positive qualities.
Expanded clay has been used to insulate building objects since the last century.
Expanded clay belongs to the group of bulk thermal insulation. It is used more for insulating a horizontal surface, to which the ceiling from the attic side belongs. With thermal insulation of vertical structures, additional structures are created that allow backfill.
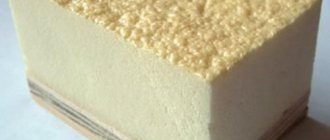
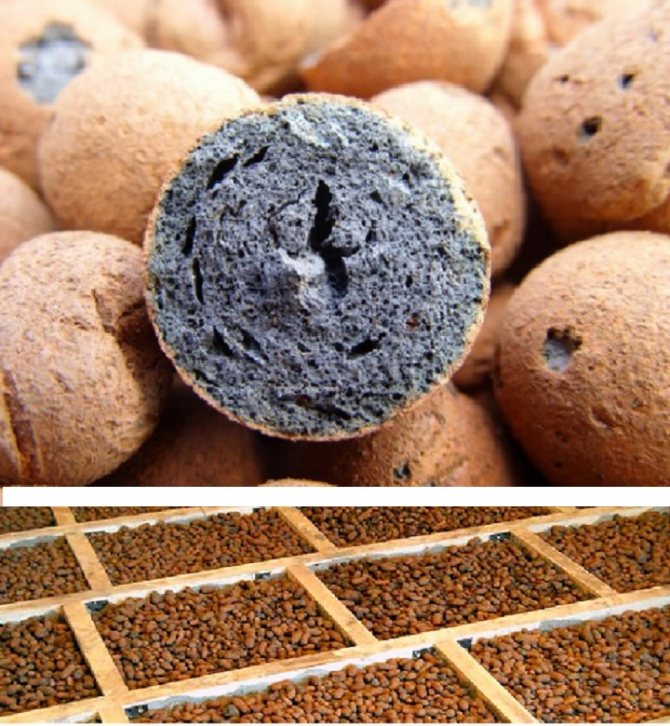
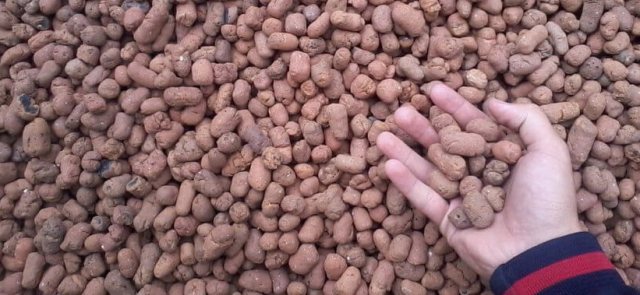
Thermal insulation consists of irregularly shaped granules of different sizes. The main production material is shale clay, which is fired. Each granule forms a hard shell on top, and a porous body inside. Due to the presence of air bubbles, the thermal insulation properties are increased.
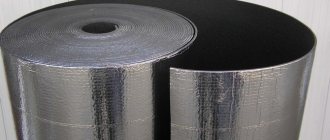
Important! Popular insulation materials are arranged according to the principle of expanded clay porosity, such as: foam plastic, foamed polyethylene, polyurethane foam, etc.
The main advantages are:
- Fire safety. Since expanded clay is made of clay, even an open source of fire is safe for it. Natural material does not emit harmful substances when heated.
- Light weight. Due to the porosity, the clay granules are light, which makes it possible to fill the ceiling from the attic with a thick layer.
- Resistant to damage. The granules do not gnaw mice, they withstand mechanical stress, are resistant to the destructive actions of fungi and putrefactive microorganisms.
- Ease of use. To insulate any structural element, the material is simply covered with a layer of a certain thickness.
- Long service life. Granules withstand extreme conditions, do not lose their thermal insulation properties after 25 cycles of freezing and thawing.
- Affordable cost.
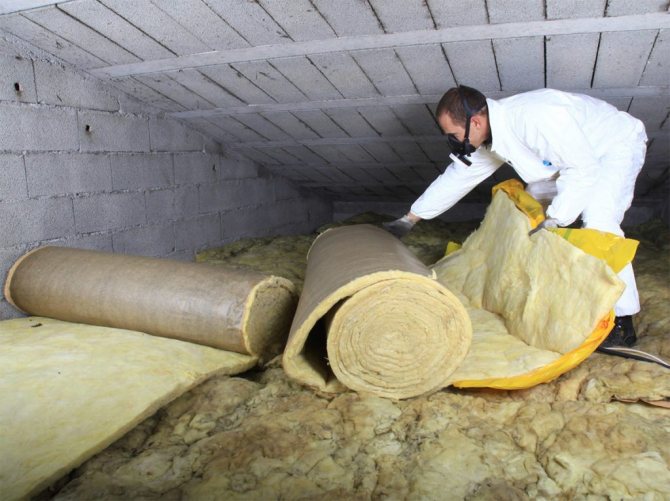
Of the minuses, one can single out a large dust formation while working with granules. It is problematic to lift the material to the attic for insulation. You will need tools, helpers. If the backfill area is large, a crane will have to be hired, resulting in additional costs.
Porosity indicates that the granules absorb moisture. When insulating an attic, the backfill layer on both sides must be covered with a membrane. The material is lightweight, but not so light that the false ceiling can withstand it. The overlap must be strong, or you will have to abandon the insulation with granules.
What is expanded clay
When it comes to insulating the ceiling in a private house from the outside, then granular and fired clay pellets can be considered the number one material for stability of characteristics, good thermal insulation and high resistance to all types of thermal and mechanical loads.
The granulate is obtained by high-temperature firing of special types of clay. After evaporation of water, a microporous structure is formed, which has high heat and sound insulation properties. Ordinary clay for the manufacture of expanded clay for the needs of the insulation of residential premises is not used.
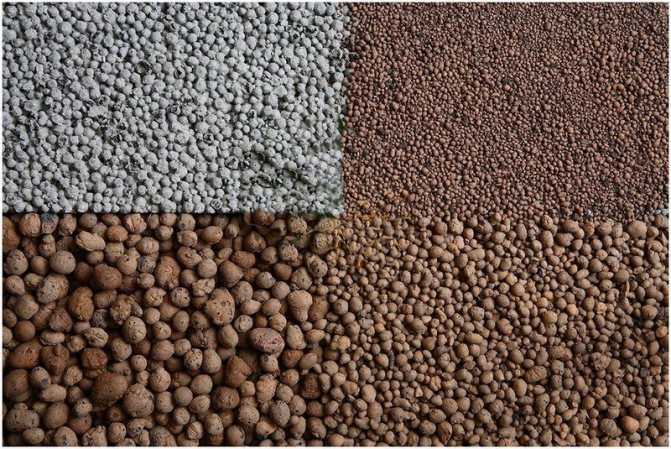
Expanded clay material is produced in two fractions:
- Fillable fines or sand. In fact, this is screening and debris of larger granules. The size of the grains of the backfill used to insulate the ceiling is in the range of 0.2-6 mm;
- Batch granulate, up to 4.5 cm in size.This type of expanded clay can also be used to insulate the ceiling, but most often the material is used for capital dumps with a thickness of 10 cm or more.
Advice! The mixture contains just admixtures of sand and gravel, so the quality must be checked before buying.
For bulk purchases from the manufacturer of expanded clay granules - sand is supplied in bags of 200 kg and 40 kg. The material is usually clean, free from impurities. From small suppliers you can buy granules for filling the ceiling mixed with gravel.
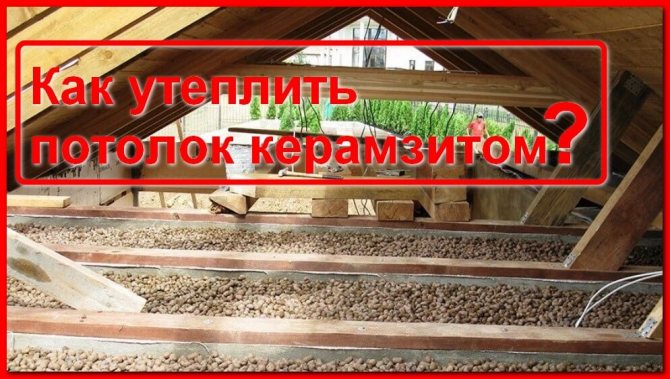
How to prepare an attic for backfilling with expanded clay
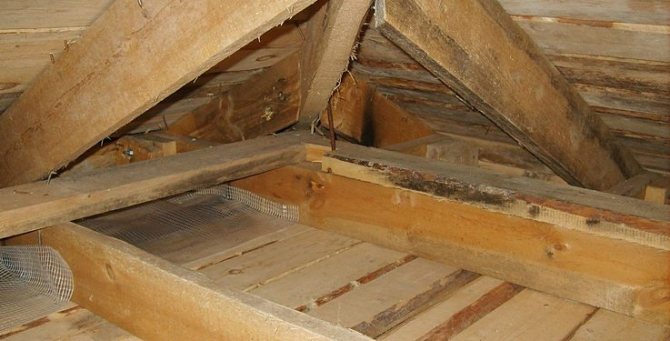
Before starting work, all foreign objects are removed from the attic. If dampness is present, dry it by creating a draft. They are thinking over a way to raise expanded clay. You may need to remove a couple of sheets of roofing if you cannot do this through the hole in the attic.
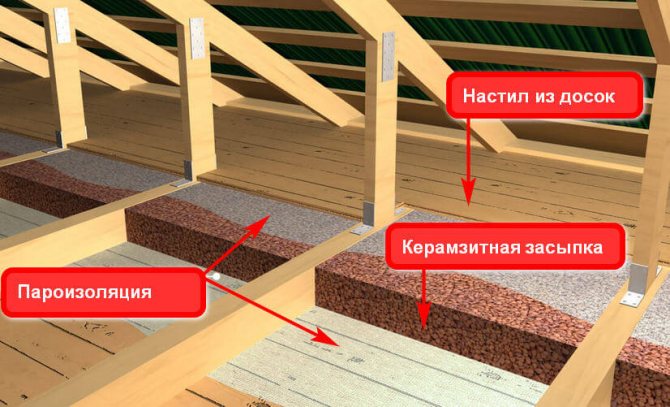
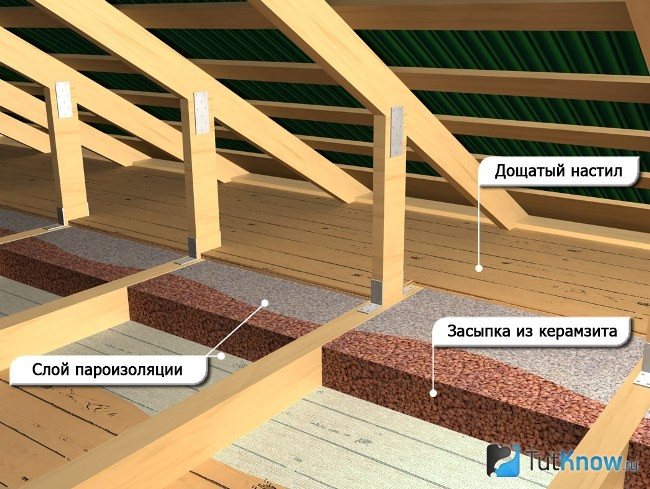
The vapor barrier is laid across the log
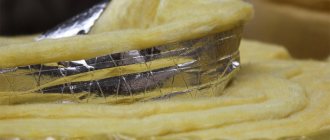
Most often, houses are equipped with wooden ceilings. Before filling it with expanded clay, you need to lay a moisture-proof membrane. A vapor barrier, roofing felt or a regular film will do. The strips are covered across the beams. At the joints, an overlap is made 10-15 cm wide. The seams are glued with tape. If roofing material is chosen to protect against moisture, then the tape is not able to reliably fasten the hard edges of the strips. The joints are glued with bitumen mastic or just liquid bitumen melted over a fire.
So that when filling the thermal insulation the granules do not damage the vapor barrier, it is first covered with a thin layer of dry powdery clay. Lumps up to 1 cm in diameter are allowed. Clay is leveled with a rule. Over the entire area, a uniform layer with a thickness of 2 to 5 cm should be obtained. This completes the preparation for insulation.
How to raise expanded clay to the attic
The complexity of insulation is associated with the supply of insulation to the attic. A lot of loose material is needed. In production, special machines are used. At home, they come up with different devices.
Special machines in production help to quickly feed expanded clay to a height in large quantities
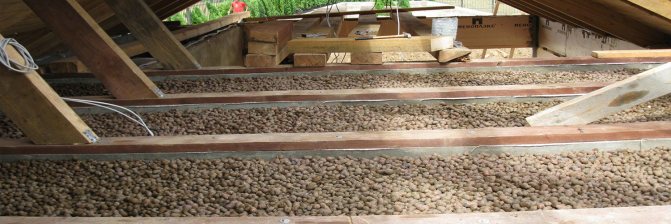
For insulation to be effective, it is optimal to use expanded clay of three fractions. The granules are mixed before being fed to the attic. They do it on the ground. The presence of granules of different sizes will make it possible to obtain a dense and even layer of insulation.
For the supply of bulk materials to the attic in private construction, various devices are used. Most often, a block is hung on a beam. Buckets are hooked on with a rope. You will need at least two assistants: one loads on the ground, and the other scatters insulation over the ceiling. To speed up the process, the block can be lifted not by buckets, but by a container of greater capacity, for example, a trough.
If expanded clay is purchased packaged in bags, the ascent to the attic is simplified. There is no need to load it on the ground. You just need to pick up the bags and lift them in a block. Another device is a soft container. It is made from a piece of sturdy tarpaulin. Loops are made at four corners, ropes are attached. The four free ends are tied in a knot. It looks like a hammock. At a time, you can lift up to 100 kg of granules with a strong tarpaulin.
If the attic is large, it is difficult to manually lift a huge amount of building material. Here it is optimal to use the service of a crane. However, you will have to dismantle several sheets of roofing, as the supply will be through the roof.
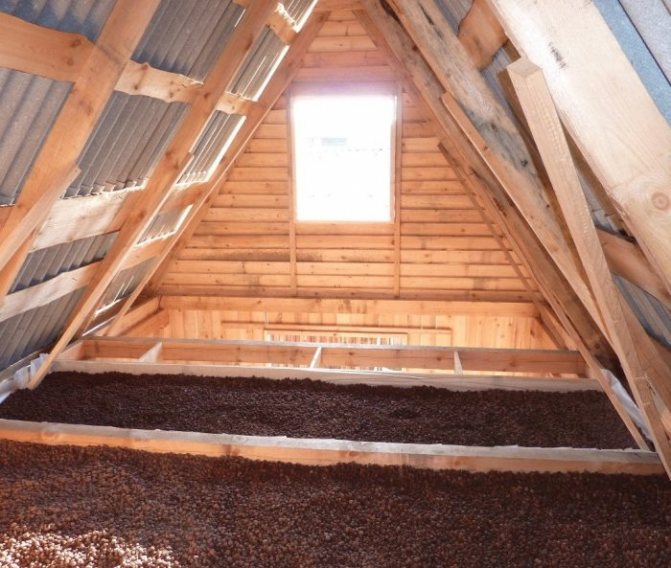
The thickness of the expanded clay layer for insulation of the attic
Insulation will be effective only if the layer thickness is correctly calculated. The parameter depends on the climatic conditions of the region, the material of the ceiling, the device of the roofing pie. The minimum layer of expanded clay for warming the attic is 15-20 cm. However, such parameters are acceptable for buildings located in the southern regions. It is desirable to have a warm roof and wooden ceiling.Wood also has good thermal insulation properties, which makes it possible to reduce the thickness of the expanded clay backfill.
The thickness of the insulation backfill depends on the climate of the region and the design features of the roof
For cold areas, this layer thickness for the attic is unacceptable. The same applies if the floor is concrete and the roof is cold. Effective insulation can be achieved with an increase in layer thickness up to 30-40 cm.
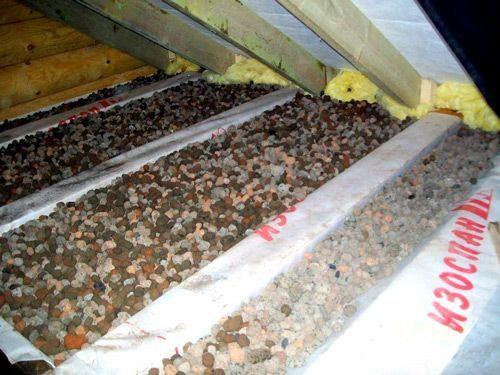
When calculating the thickness of the insulation, take into account the strength of the floor. Depending on the fraction, the mass of 1 m3 of expanded clay varies from 250 to 450 kg. The heaviest expanded clay sand, but it is not needed to insulate the attic. The overlap must withstand the load at a certain layer thickness.

Ceiling insulation technology with expanded clay
The algorithm for carrying out thermal insulation works is reduced to two main measures: laying a vapor barrier and filling it with bulk materials of different fraction.
Preparatory work
The need for preparatory work directly depends on the surface on which the heat insulator will be poured. If the insulation takes place directly along the reinforced concrete floor, then no special preparation is required. It is enough to remove large debris. In this case, expanded clay simply crumbles over the surface, after which it remains only to level it with any improvised tool and method.
In other cases, careful surface preparation will be required for the installation of future insulation. Especially in those rooms that have already been repaired many times. First of all, the surface is cleaned of any dust, and if there is an old coating or even its remnants, they must be eliminated. It is quite easy to remove old plaster or whitewash if you moisten them well with water and wait a while.
In more difficult cases, when, for example, the ceiling was previously painted, it can be very problematic to peel off the old paint. It is worth trying to knock it down with a perforator or go through with a grinding tool to such an extent until the edge becomes even. The cleaned surface is treated with a soil solution - this is done with the aim of keeping all future layers as firmly as possible.
It is necessary to start priming from the corner, gradually moving towards the center of the ceiling in the room. Be sure to carefully process all existing joints. The solution should be applied in even and approximately equal horizontal stripes. After the entire ceiling is evenly painted, it is allowed to dry for a couple of days before proceeding with thermal insulation.
In the question of how to insulate the ceiling with expanded clay, you cannot do without pre-prepared tools and consumables. So, stock up on the following tools: jigsaw, screwdriver, drill, grinder, hacksaw, working cans (other containers), shovel, hammer, ax, paint roller or brush, paint bath.
From consumables you will need: multi-fraction expanded clay, flooring board, wooden lath, screws, self-tapping screws, nails, mounting foam, double-sided construction tape, cement, sand, ceiling primer.
Installation instructions for expanded clay
The whole process of warming can be reduced to several main stages:
- First you need to perform a vapor barrier. To do this, you can use ordinary plastic wrap or roofing felt, but it is better to resort to special membranes. The choice of material is especially important in those rooms where there is no natural ventilation or ventilation. It is laid in one layer and fixed on top with a wooden frame.
- Almost any wood can be used to make the frame, based on the humidity in the attic.Wooden logs are laid across the room, while thinner beams are mounted longitudinally.
- As soon as the frame and the film are fixed, you can start filling the cells with bulk insulation. The easiest way is to use expanded clay of the same fraction. In this case, it crumbles over the vapor barrier, and the only thing that needs to be paid attention to is the uniformity of distribution and the thickness of the backfill.
- In the case when different fractions are used, a layer of fine granules can be made first. Then at least 20-30 cm of coarse-grained material is poured and another layer of granular expanded clay sand on top.
- You can achieve more effective insulation by carefully tamping the heat insulator. To prevent the granules from being damaged and not losing their characteristics, the entire layer is preliminarily woken up with ordinary river sand.
- You can make the insulation even better by pouring a concrete screed onto a layer of heat insulator. In this case, there will be no need to reuse the vapor barrier film. The concrete screed itself will serve as the basis for the finishing, on which the board or other materials are laid.
Note! It is not recommended to fill the cells between the lags with expanded clay completely. It is necessary to leave a free gap of 1-2 cm between the final surface of the floor and the insulation. This will avoid touching the granules and an unpleasant squeak as a result.


How to insulate an attic floor with expanded clay
The technology depends on the overlap device. The use of expanded clay is possible for concrete surfaces and on beams. Warming of the suspended ceiling and other types of weak floors with granules is not performed.
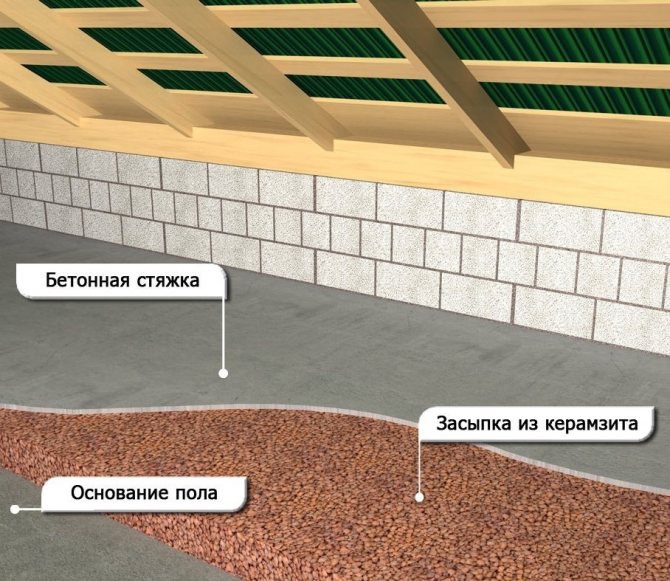
On the concrete floor, the expanded clay should be optimally laid under the screed
To insulate the attic floor slabs with expanded clay, the concrete surface is covered with waterproofing bituminous mastic. Beacons are installed along it, making it possible to maintain the same thickness of the backfill. If they will not walk in the attic or use it to store things, it is enough to cover the insulation on top with a film. The joints of the sheets are sealed with tape.
Insulation will be more reliable with a screed. The granules are poured with cement milk. The attic is dried for at least a week, creating a good draft. A reinforcing metal mesh is laid on the insulation, poured with a concrete screed about 4 cm thick. You can move on such a surface, use the attic as a storage facility for inventory.
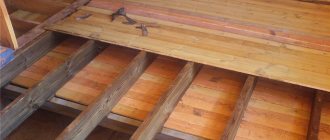
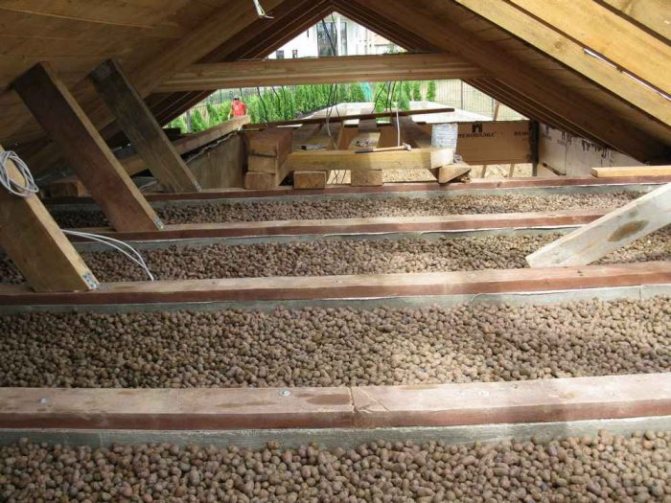
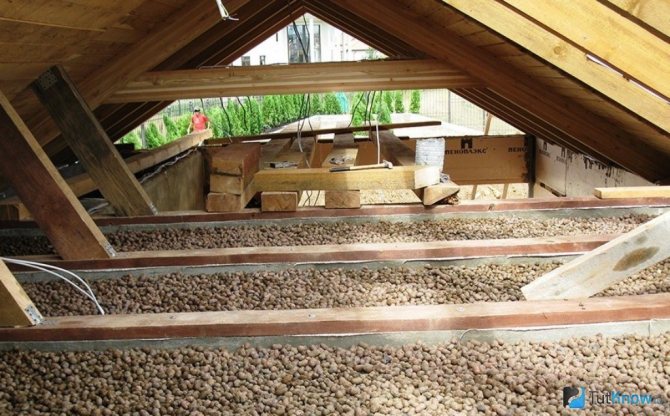
On a wooden floor, the backfill is carried out between the beams
To insulate the attic with expanded clay for a wooden floor, a vapor barrier is laid on the beams. From the side of the room, the ceiling should be hemmed with a solid board. She will play the role of a rough floor. Expanded clay is poured between the logs. From above, the insulation is covered with a vapor barrier. If the attic will be used, a boardwalk is laid over the beams after insulation.
How it's done?
What will the ceiling insulation look like with expanded clay?
Reinforced concrete
To begin with, we will consider the insulation of reinforced concrete floors with expanded clay.
- In this case, surface preparation is not required. Absolutely.
- Expanded clay is poured onto floor slabs and leveled in any way, up to the use of a garden rake.
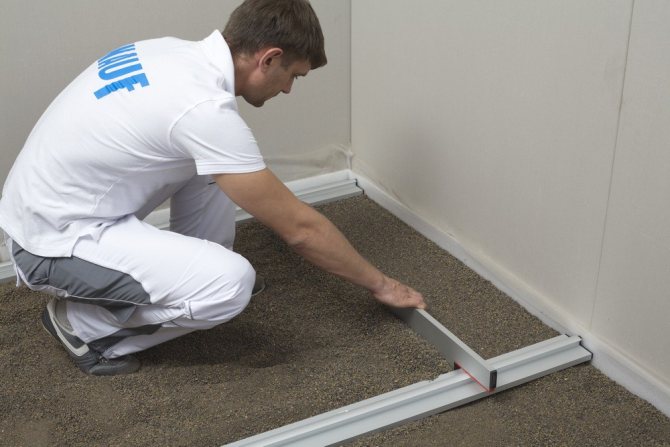
Tip: to control the uniformity of the layer, you can use the simplest device - reinforcement with a strip of electrical tape glued to it. It is enough for her to pierce the layer of insulation to the overlap: the height of the mark above the expanded clay will give a clear idea of the thickness of the layer.
From above, expanded clay is covered with roofing material or ordinary polyethylene. It is advisable to glue the joints of the strips in order to reliably protect the material from moisture (see How to insulate the ceiling in a garage with your own hands).

On reinforced concrete, it is enough to sprinkle expanded clay in an even layer and protect it from moisture from above.
Wooden beams
At the risk of repeating ourselves, we recall: it is worth filling a ceiling hemmed from below to the beams only if it has a large margin of safety for fastening. For example, if the OSB layer is not just hemmed from below, but has an additional crate under it, sewn through it to the beams with pins. The very filling of the floor in this case will be slightly different from the previous scenario:
- We cover the space between the beams with a waterproofing film. It can be simple polyethylene: it is strong enough and very durable. Waterproofing should cover not only the space between the beams, but also the beams themselves; the canvases are overlapped by several centimeters and glued with any adhesive tape.
Waterproofing should cover the joists.
- We fill in expanded clay and level it. The level should be slightly lower than the future flooring: a possible creak from friction between the stones has already been mentioned.
- We cover the second layer of vapor barrier on top. It can be the same polyethylene, roofing material, glassine, and any of the more modern materials. The tightness of the overlap of the canvases will not be superfluous here.
- Then we calmly lay the floor on the beams or the joists laid across them and use the room as a summer attic or storage room for infrequently used things.
The ceiling is insulated, you can walk in the attic.